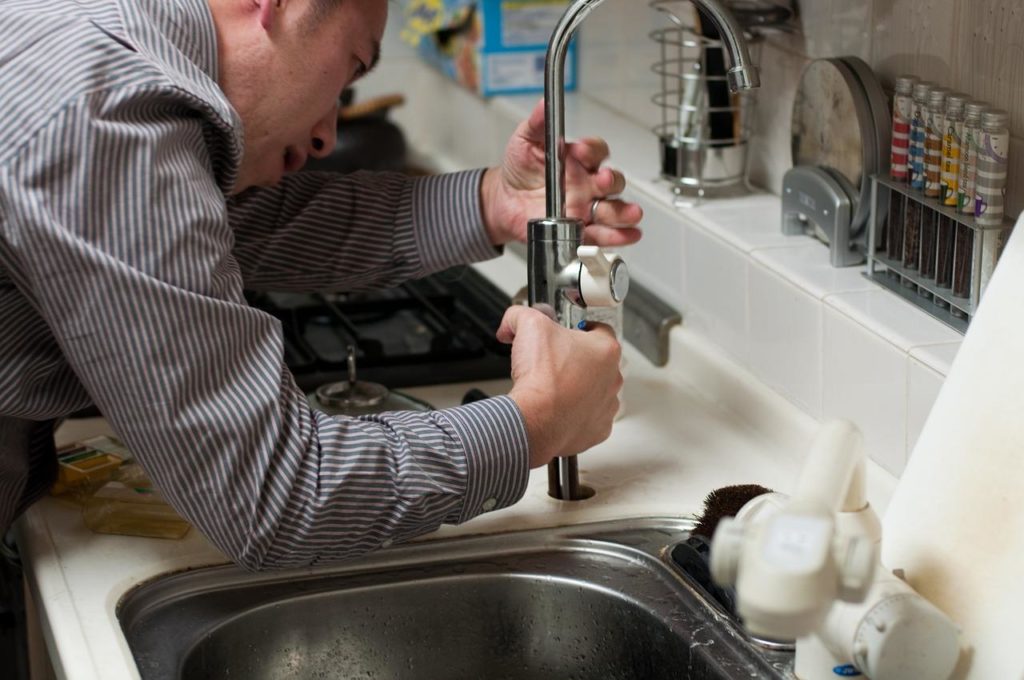
Kitchen Island Plans | Custom Kitchen Islands

May 7th, 2008

Custom kitchen island

Kitchen islands are a wonderful solution to many kitchen problems. With kitchen island you can create…

  • an extra storage area in your kitchen
  • a place for work, where you can prepare your favorite food
  • a place where you can clean your dishes and utensils
  • a place where you can eat with your family

There are two types of kitchen island…

  • portable kitchen islands
  • custom kitchen islands

Before choosing your type of kitchen island, consider carefully how you will use it. The kitchen island you will use as a storage area will be different from one you will use for washing, cooking and/or eating on.

  1. Will you prepare food on it?
  2. Will you eat with your family on it?
  3. Will you wash the dishes on it or just store them on it?

The answers to these questions, in combination with the size of your kitchen and the sum you can afford, will enable you to decide upon what type of kitchen island is best for you.

Custom kitchen islands review

You can have this type of kitchen island custom-made by specialists. In addition to storage area, you can build appliances into it, such as…

  • a sink
  • a dishwasher
  • a small refrigerator or refrigerated drawers
  • cooking tops, oven, microwave
  • warming drawers, to keep food hot if necessary…

You can choose your own shape for this type of kitchen island. For example, rectangular, square, oval, round, L-shape or other broken lines.

You can make your island with a multi-leveled countertop; with, for example, a lower level on which to prepare the food and an upper one to eat on. (The height of the place where you eat depends on the kind of seats you want: standard chairs, stools or bar stools.) In addition, it’s good to match the design of your custom island with the design of your kitchen, in order to harmonize everything.

For the countertop of this kitchen island you can use wood, natural stone, stainless steel, etc. What material is suitable for your countertop depends on what you will use it for. For example, for safety, it is a good idea to use stone or steel around places you will cook because they resist the heat of hot pots and pans. You can also use these materials round the sink. A wooden countertop is suitable for preparing food.

You can use this type of kitchen island not only as a storage area, but also for a cleaning center or a place where you can eat or prepare food. However, not every kitchen is suitable for installing a custom kitchen island. You have to consider such factors as…

1. Space: there has to be at least 42 inches (107 cm) of space from the most exterior edge of the island to the objects around it, on all sides. Only then will you be able to walk around the island without difficulty, and open the doors of cabinets and appliances.

If you work with other people in the kitchen, you can avoid problems by increasing the distance to 48 inches (122 cm).

2. Ventilation: this needs to be considered if you intend to use your island for cooking on. A hood, suspended from the ceiling, is one solution. A downdraft, installed behind the cook top, is another. You should consult a specialist regarding the choice of an appropriate ventilation system.

3. Lighting: good lighting is closely related to the functionality of your kitchen island. One solution is a lamp, suspended from the ceiling and directed at the surfaces of the island. Another solution is to fix a number of lamps to the hood (if you intend to have one).

4. Electricity: consider this if you intend to use electrical appliances on your custom island. Place the outlets for these appliances in a location on the island where they will not come into contact with water and splashes from washing and cooking, thus avoiding electric shocks.

5. Water supply and drainage: this must be considered if you intend to use water on your island. The best solution here is to consult a specialist, because using water will require changes to the floor of your kitchen. Click here to submit your project and receive free estimates from highly rated local, licensed contractors within 48 hours with no obligation.

See also:

Ganka Vasileva is the owner of http://www.helpful-kitchen-tips.com, a website containing useful information about the kitchen; about the equipment of this greatly-used room in our home that occupies a special place in our lives. Buying guides for kitchen cutlery, small appliances, cookware & bakeware, kitchen furniture, storage & organization, plumbing, etc.

Kitchen Island Plans | Portable Kitchen Islands

May 7th, 2008

Portable kitchen island

Kitchen islands are a wonderful solution to many kitchen problems. With kitchen island you can create…

  • an extra storage area in your kitchen
  • a place for work, where you can prepare your favorite food
  • a place where you can clean your dishes and utensils
  • a place where you can eat with your family

There are two types of kitchen island…

  • portable kitchen islands
  • custom kitchen islands

Before choosing your type of kitchen island, consider carefully how you will use it. The kitchen island you will use as a storage area will be different from one you will use for washing, cooking and/or eating on.

  1. Will you prepare food on it?
  2. Will you eat with your family on it?
  3. Will you wash the dishes on it or just store them on it?

The answers to these questions, in combination with the size of your kitchen and the sum you can afford, will enable you to decide upon what type of kitchen island is best for you.

Portable kitchen islands review

Portable kitchen islands are available as a ready-to-use variant, looking like a cabinet or a table with rectangular or square shape. They can offer you…

  • a countertop for work
  • cabinets for pots and pans
  • shelves for recipe books
  • drawers for utensils
  • shelves, towel and cutlery racks, wine racks…

The countertop of portable islands is most often made of one material only, but it can consist of a combination of materials as well, according to your work needs; for example, wood plus stainless steel is a possibility. It can be also come with a drop leaf, to save space when you are not using it.

Some portable kitchen islands have wheels, and can thus be moved easily from place to place (for example, near the range or the sink, according to your specific needs). Others have legs or feet, making them seem more like furniture.

When using this kind of kitchen island, you can’t build in appliances. You can use them mainly for storing utensils or preparing food. In general, portable kitchen islands are a good solution if you have a small kitchen.

Click here to view some high quality portable kitchen islands.

See also:

Ganka Vasileva is the owner of http://www.helpful-kitchen-tips.com, a website containing useful information about the kitchen; about the equipment of this greatly-used room in our home that occupies a special place in our lives. Buying guides for kitchen cutlery, small appliances, cookware & bakeware, kitchen furniture, storage & organization, plumbing, etc.

Kitchen Juicers Review | Citrus Juicers | Juice Extractors

May 5th, 2008

With a kitchen juicer you’ll be able to extract fresh juice from various fruits and vegetables, juice that will benefit your health greatly because it has a huge nutrient value, it is easy digested and you can control the amount of sugar in it.

Kinds of kitchen juicers

The juicers can be divided into two basic types…

  • citrus juicers
  • juice extractors

Some other devices, made especially for wheat grass and other hard treatable vegetables, are also available. However, it will be wiser if you select a general-purpose juice extractor that can process all kinds of fruit and vegetables.

Citrus juicers

Citrus juicerThese devices are designed only for citric fruits, such as oranges, lemons and grapefruits. They are cheaper than juice extractors and function by means of a ribbed cone, on which the inside part of half of fruit is crushed.

There are hand citrus juicers, for example in the form of a press, which will be activated by means of a handle, and electrical citrus juicers; some of them are just an attachment for a stand mixer.

Here are some of the qualities that make for a good citrus juicer…

  • different-sized cones for extracting juice from fruits with different diameters.
  • a strainer for adjusting the content percentage of fruit pulp in the juice. In general, juice containing more pulp is thicker and has more nutrients.
  • a spout that you can use to pour the juice directly into a utensil. It is best if the spout is high enough to put tall glasses under it. The same also refers to the centrifugal juice extractors below.

Click here to view some high quality citrus juicers.

Juice extractors

These devices have far more functions than citrus juicers; that’s why some of them cost more than $400. They can be divided into two basic types…

  • centrifugal juice extractors
  • masticating juice extractors

1. Centrifugal juice extractors

Centrifugal juice extractorThis kind of kitchen juicer is a good variant for preparing juice quickly. It cuts the product by means of a rotating blade and rotates the obtained pulp at high speed to extract the juice from it.

When choosing such a juicer, look for a model that ejects the produced pulp into a separate container. This will enable you to extract juice for a long time without having to stop to clean up; this is in contrast to juicers that gather the pulp in the same box where the food to be processed is cut. In addition, machines that have a separate container for pulp become unstable less often.

The disadvantage with centrifugal juice extractors is that you can’t use them for hard-treatable products, such as hard vegetables, leafy greens and fibrous vegetables. Further, rotating at high speed produces heat, which has a bad effect on the enzymes in the produce. The juice also becomes oxidized, which reduces the nutrient content.

2. Masticating juice extractors

Masticating juice extractorThese devices are usually more expensive than centrifugal juice extractors, but you can use them for a great variety of foods, including hard, leafy and fibrous vegetables. By adding different attachments to them, you can make pasta, nut foods, baby foods, frozen desserts, paste, sauces, etc.

These kitchen juicers grind the product until a pulp is obtained, and then press it in order to extract the maximum amount of juice from it. One strong advantage of this type of juice extractor is that the operating speed is slow, which prevents oxidation and avoids excessive heat. Thus, your juice will have more fiber, enzymes, vitamins and minerals.

Some masticating juice extractors can even stabilize the juice, keeping it fresh for a longer time.

Click here to view some high quality juice extractors.

Factors to consider when selecting kitchen juicers

First decide what kind of juicer you need, then think about the following…

1. Guarantee: look for a juicer that will last for years. You will be able to use it every day without worrying about whether it will break down.

2. Ease of use: you have to work with your juicer with ease, because otherwise you will not use it. It has to be…

  • comparatively easy to lift and carry.
  • if the device is electrical, it should not vibrate much and must be comparatively silent during operation. Kitchen juicers that spin at high speed, such as centrifugal ones, tend to vibrate and be noisy.
  • it is a good idea if the electrical juicer can spin in reverse, in case it clogs with pulp.

3. Easy to clean: it should be easy to clean after use. It will be wonderful if it has easily removable component parts, which can be cleaned individually in a dishwasher.

4. Power: the power of the machine affects the variety of foods that you will be able to process. A powerful motor (one with high wattage) will not slow down even when processing harder foods; therefore the risk of damage is smaller.

5. The amount of prepared juice: with a quality juicer you will extract a greater amount of juice from the produce. With a cheap juicer you will need to buy more produce to obtain the same amount of juice extracted with an expensive juicer, and so it will cost you more over time.

6. The size of the juicer: the juice extractor takes up space, but it will be good if you can leave it on the countertop for ease of use.

7. The feed tube size: the wider the chute where you will place the produce, the less labor and time you will need to spend in preparing it.

Some juice extractors have an extra, wider feed tube, to put large items of produce such as apples and tomatoes, without chopping them into tiny pieces.

8. Availability of spare parts.

9. A place for the cable.

Ganka Vasileva is the owner of http://www.helpful-kitchen-tips.com, a website containing useful information about the kitchen; about the equipment of this greatly-used room in our home that occupies a special place in our lives. Buying guides for kitchen cutlery, small appliances, cookware & bakeware, kitchen furniture, storage & organization, plumbing, etc.

Stand Mixers Review | Kitchen Mixers

April 30th, 2008

KitchenAid stand mixer

With the help of kitchen mixers, along with their different attachments, you can make a variety of delicious foods. For example, doughy goods, ice-cream, fresh fruit and vegetable juice, sausages, etc.

There are two types of kitchen mixer:

  • hand (portable) mixers
  • stand (stationary) mixers

Which type of mixer will work best for you depends on how often you use it and especially what you use it for. If you prepare meals frequently, using techniques that require the serious use of a mixer, stand kitchen mixers are the better choice.

Most stand mixers are equipped with a working bowl, flat beater to beat basic ingredients (for example, batter for pancakes), a hook to knead dough (for example, for bread) and a wire whip to beat egg whites or cream.

You can also add different attachments to these kitchen mixers. You usually buy them separately and they may include a…

  • citrus juicer
  • sausage stuffer
  • ice-cream maker
  • food grinder (for meat, for example)
  • pouring shield
  • extra bowl for mixing…

The price of stand mixers can exceed $500, depending on their functionality and construction.

Characteristics of stand kitchen mixers

1. Capacity: the mixing bowls of most stand kitchen mixers have from 4.5 to 7 quarts (5.1 to 8 l) capacity. The greater the capacity, the more cups of flour or dough you can work with at the same time.

2. Power: the power of the mixer is measured in watts. The more watts of electricity your mixer uses during its operation, the more easily it will mix the ingredients. In addition, when the power is greater than about 300 watts there is a reduced likelihood that your mixer will be overloaded and burn out.

3. Number of speeds: the greater number of speeds your mixer has, the better control you will exercise on the beaten mixture. Usually, stand mixers have more speeds than hand mixers.

4. Movement: the beaters with some stand kitchen mixers turn not only around their axis, but circle around the inner part of the bowl as well. Thus, the ingredients mix with accurate consistency, and it is not necessary to scrape them from the bowl.

5. Design: these are strong, metal kitchen mixers. It is possible, in some cases, to raise the hubs to gain easier access to the bowl, to change the attachments or to clean the mixer.

The bowls are most frequently made of stainless steel or glass. Many of them have a handle plus spout to help you work more comfortably.

Advantages of stand kitchen mixers in comparison with hand mixers…

  • they save you time. It is not necessary to hold the mixer while it is operating, so you are free to do some other work, for example, cleaning or tidying your kitchen.
  • with their various attachments, they are very versatile, allowing you to perform a greater range of tasks with them.
  • they have greater power and strength; you can use them for more heavy-duty tasks or for a greater volume of work.

Disadvantages…

  • stand mixers take up space. Because of their size and weight (some weigh more than 20 pounds (9.1 kg)) you may wish to put your mixer on the kitchen countertop, so you need to make sure you leave enough space for it.

Click here to view some high quality stand mixers.

See also:

Ganka Vasileva is the owner of http://www.helpful-kitchen-tips.com, a website containing useful information about the kitchen; about the equipment of this greatly-used room in our home that occupies a special place in our lives. Buying guides for kitchen cutlery, small appliances, cookware & bakeware, kitchen furniture, storage & organization, plumbing, etc.

Hand Mixers Review | Kitchen Mixers

April 30th, 2008

KitchenAid hand mixer

With the help of kitchen mixers, along with their different attachments, you can make a variety of delicious foods. For example, doughy goods, ice-cream, fresh fruit and vegetable juice, sausages, etc.

There are two types of kitchen mixer:

  • hand (portable) mixers
  • stand (stationary) mixers

Which type of mixer will work best for you depends on how often you use it and especially what you use it for.

You can use hand mixers mostly for easier jobs that you do occasionally; for example, beating egg whites or cream, preparing batter for pancakes or biscuits, mashing potatoes, etc.

Normally hand mixers are equipped with two traditional beaters, but you can find mixers with a greater number of attachments; with, for example, a wire whip and/or dough hooks, which will enable you to do more things with your mixer.

Given their low price (from less than $15 to about $100) it is good to have some of these hand mixers in your house. The exact price you will have to pay depends on their functionality and construction.

Characteristics of hand kitchen mixers

1. Number of speeds: using hand kitchen mixers that have a greater number of speeds (5 or more), will give you greater control over the beaten mixture. For example, at the slowest speed you can start to beat the ingredients without scattering them out of the bowl. At a fast speed you can create the air volume that is needed to beat egg whites or cream.

2. Weight and noise during operation: you will work more pleasantly with light, silent and well-balanced hand mixers. A weight of about 2 pounds (0.91 kg) is acceptable.

3. Design: it will be more comfortable for you to hold kitchen mixers that have a handle bent to the rear than those whose handle is parallel to their body. With such a handle, you will reduce the tension in your hand while working.

For cleaning after use, it is better to have a mixer with a simple design; i.e., without too many fittings and details where dirt can gather over time.

Some hand mixers are equipped with a base that includes a mixing bowl, as with the stand mixers, and you can separate the mixer from this base. The good thing here is that, in addition to the mobility of hand mixer, you have an extra mixing bowl.

There are also mixers with only one beater (also known as hand blenders). However, with these elegant devices you have more limited possibilities for use.

Hand blender

Advantages of hand mixers in comparison with stand mixers…

  • they save space on you countertop area; they are small, compact, and easily stored (you can put them in a drawer).
  • their price is lower than that of stand mixers, yet they enable you to perform many tasks in the kitchen in the same way as you would with a stand mixer.
  • because of their mobility (some do not even require a cable) they will be easier to use when performing simple tasks. In addition, you can use them to stir in your favorite bowl, as opposed to with a stand mixer, when you have to use the bowl that comes with the mixer.

Disadvantages…

  • hand mixers are not sufficiently robust to withstand intensive use or to perform heavy-duty tasks (for example, kneading bread) because of their delicate construction and low power.

Click here to view some high quality hand mixers.

See also:

Ganka Vasileva is the owner of http://www.helpful-kitchen-tips.com, a website containing useful information about the kitchen; about the equipment of this greatly-used room in our home that occupies a special place in our lives. Buying guides for kitchen cutlery, small appliances, cookware & bakeware, kitchen furniture, storage & organization, plumbing, etc.

Kitchen Backsplash Ideas

April 23rd, 2008

Kitchen backsplash

The kitchen backsplash is placed on the kitchen wall between the countertops and the wall cabinets. It protects the walls and especially the zones behind the range, the sink, and the places where you prepare the food, from staining. Your backsplash will stain, but the materials appropriate for it are usually easy to clean and maintain and are a far better option than just a bare painted wall or wallpaper.The kitchen backsplash also has aesthetic value. With colors, patterns or textures appropriate for a backsplash you can improve the visual appeal of your kitchen, without difficulty and at a reasonable price.

Some backsplashes are only about 4 inches (10 cm) high and are usually a continuation of the countertop. These are not effective, because if you don’t cover the entire area up to the wall cabinets with a backsplash, significant parts of the wall will remain unprotected. With a standard backsplash, about 18 inches (46 cm) high, you will cover the whole area between the countertops and the wall cabinets and you will give your kitchen a finished look.

You might place your backsplash only behind detached zones in your kitchen, such as the range and the sink, thereby attracting attention to them; but a better option is to place a backsplash along the whole length of the room, thus achieving a unified look.

Kitchen backsplash materials

The following materials are popular variants for a kitchen backsplash. Many of them are used for kitchen countertops as well, which means that your backsplash and countertops can be made of one and the same material. The materials are strong, durable and usually easy to clean and maintain. I say usually, because some tiles, stone or metal may require periodic maintenance (sealing or polishing), according to the manufacturer’s instructions.

1. Ceramic and porcelain tiles: these tiles exist in various colors, patterns and textures and may imitate natural stone as well.

2. Metal and metal laminate: with a backsplash from a stainless steel sheet you will give your kitchen a modern and simple look. Besides, its neutral color matches most other colors.

You may use others metals as well, such as copper, zinc, tin, brass or nickel. Some of the metals will change their look with time if you don’t maintain them, and this effect may appeal to you.

As a cheaper variant you may use metal laminate. This is similar to plastic laminate, but is covered with a metal layer.

3. Natural stone: an exceptionally fine material with a unique pattern for each of its layers, making your backsplash different from that of anybody else. It is also extremely durable.

You may use various kinds of stone. For example granite, marble or limestone.

4. Solid surface: synthetic material, existing in variety of colors, patterns and textures. It may also imitate natural stone.

5. Glass: with a backsplash from glass sheets you will, again, give your kitchen a modern and simple look. And, if you have beautiful pictures on the wall, they can still be seen through the glass, while being protected from damage.

Some other, not so traditional, materials for backsplashes exist as well, such as cork, but they are used more rarely or have yet to gain popularity.

Cork, in particular, is a naturally textured soft material. You may pin notes and recipes on it, but I think it’s not very appropriate for the key zones in the kitchen, such as the range and the sink, because you will find it difficult to clean.

Kitchen backsplash design

If you want a simple look, select a backsplash with the same design as your countertop.

If you are looking for a more vivid effect, select patterned tiles. For example, you could use square tiles, set on a diagonal in contrasting colors, like a checkerboard.

Square tiles, set on a diagonal in contrasting colors, like a checkerboard

If you have a small kitchen, choose a mirrored backsplash or one with a large pattern. For example, you could use several small accent tiles in combination with large tiles with a simple design. In this way, you will make your room look bigger.

Small accent tiles in combination with large tiles with a simple design

Small accent tiles in combination with large tiles with a simple design

If you want more light on the work surfaces, such as the range, the sink and the countertops, select a light backsplash, because light tones and shiny surfaces reflect the light well.

Since the backsplash is between the countertops and the wall cabinets, it is a good idea for it to match both the colors and the textures of the countertops or wall cabinets, with color being the more important. As far as the shape of the backsplash is concerned, some of the materials above, in addition to standard tiles, also exist as sheets. With sheets there won’t be gaps that have to be filled with grout and this means that you will be able to clean the backsplash more easily. (The grout, which fills the gaps between tiles, gathers dirt with time and requires periodic cleaning.)

If you select standard tiles, allow the larger ones to predominate over any smaller ones, because then there will be fewer gaps to fill with grout, and so less to clean. As far as the grout is concerned, the darker its color, the less the dirt on it will be visible.

Price of kitchen backsplash

The price of your backsplash will be determined by such factors as…

  • the size of the area that the backsplash covers.
  • the material used.
  • the design.

In general, a backsplash made of ceramic or porcelain tiles will be cheaper than one made of stone or metal. However, if you have your tiles custom-made, they might be very expensive.

Kitchen backsplash installation

To be sure of the quality of your kitchen backsplash installation, I recommend that you employ the services of a professional. Click here to submit your project and receive free estimates from highly rated local, licensed contractors within 48 hours with no obligation.

Ganka Vasileva is the owner of http://www.helpful-kitchen-tips.com, a website containing useful information about the kitchen; about the equipment of this greatly-used room in our home that occupies a special place in our lives. Buying guides for kitchen cutlery, small appliances, cookware & bakeware, kitchen furniture, storage & organization, plumbing, etc.

Other resources: Granite backsplash installation video

Kitchen Countertops Review

April 10th, 2008
Kitchen countertops

When choosing kitchen countertops, consider carefully what you need and what you can afford. It’s a good idea to choose the most functional material possible for your countertop. It needs to be…

  • durable.
  • easy to clean and maintain.
  • stain-resistant to all liquids, even acids.
  • heat-resistant to many different objects (pots, pans…).
  • scratch-resistant, to avoid scratches while cutting ingredients on it.
  • a suitable match for your tastes and kitchen design.

It’s difficult to find material for kitchen countertops that possesses all these qualities, so a combination of different kinds of materials is perhaps the best option. It’s interesting, practical and probably cheaper. For example, you can use a quality material, such as granite, for places that receive the most frequent use (e.g., around the range or the sink), and you can cover the rest with cheaper material, such as laminate.

Kinds of material for kitchen countertops

The following materials are popular choices for kitchen countertops. Some other, less traditional ones, such as lava stone, glass, paper-base, copper & zinc, are also used, but less often; perhaps they will become popular in the future.

Some of them require comparatively little care and maintenance. Others you might need to maintain regularly (e.g., resealing and/or polishing), according to the instructions of the manufacturer.

1. Natural stone

Expensive, but functional. You can use different types of stone for your kitchen countertops: granite, marble, mineral soapstone, slate… Each one has its advantages and disadvantages. What unites them is their excellent durability.

Granite is a stone that possesses highly desirable qualities, and it can be used anywhere in your kitchen; round the sink, round the range, for a food preparation area… If price is a consideration, you might want to use it only for a kitchen island.

Characteristic features…

  • extremely durable.
  • visually appealing, with a unique pattern for each layer.
  • scratch-resistant (in contrast to marble, which is a softer stone).
  • heat-resistant.

Disadvantages…

  • absorbs liquids; you may need to maintain it regularly.

2. Stainless steel

This is a functional, comparatively expensive material. It can be used anywhere in your kitchen; round the sink, round the range, for a food preparation area… You can integrate it with a sink, as a seamless unit. This will facilitate cleaning and gives your countertop an integrated look.

Other qualities…

  • neutral color, which facilitates color coordination for your kitchen.
  • trouble-free maintenance (this is the choice for countertops in the food service industry).
  • heat-resistant.
  • stain-resistant and waterproof.

Disadvantages…

  • prone to scratching.
  • prone to fingerprints.
  • easily dented; you need a hard base to attach it to (usually plywood). The hard base also serves to reduce any noise made by objects coming into contact with the steel.

3. Concrete

A comparatively expensive material. Concrete is a good solution if your countertop will have an unusual shape; you can cast it directly in your kitchen.

Characteristic features…

  • easy to shape the edges.
  • easily integrated with a sink, like the variant with the steel.
  • can be painted, polished or textured.
  • heat-resistant.

Disadvantages…

  • absorbs liquids; you may need to maintain it regularly.
  • prone to cracking.

4. Tiles

A comparatively cheap material, although custom-made tiles may be expensive. You can place them round the sink or the range.

Characteristic features of ceramic tiles, which are among the most frequently used for kitchen countertops…

  • wide range of colors, patterns and textures.
  • durable, heat-resistant.
  • glazed tiles are stain-resistant and waterproof.
  • easily replaced when damaged.

Disadvantages…

  • fragile.
  • difficult to chop or knead on them, due to the uneven surface.
  • matte tiles absorb liquids; you may need to maintain them regularly.
  • the grout between the tiles gathers dirt.

5. Laminate

An artificially produced, low-cost material, laminate is one of the most frequently used materials for kitchen countertops. It’s best to put it in places in your kitchen that are not used frequently, because its quality is not as high as that of some of the other materials.

Characteristic features…

  • a wide range of colors, patterns and textures.
  • easy to shape the edges.

Disadvantages…

  • prone to scratching.
  • vulnerable to heat.
  • fragile.
  • once damaged (burns, scratches…), it is difficult to repair.

6. Wood

A natural, comparatively cheap material. Ideal for preparing food on. A very good variant is to use it as a butcher’s block, inserted in a countertop made of other material.

Characteristic features…

  • warm, comforting appearance.
  • easy to shape the edges.

Disadvantages…

  • vulnerable to heat and moisture; you can spoil it if it is placed near the range or the sink.
  • absorbs liquids; you may need to maintain it regularly.

7. Solid surface

A moderately expensive artificial material. You can use it for a great part of your countertops in the kitchen, especially round the sink. You can integrate it with the sink, just as with steel and concrete.

Other qualities…

  • durable and trouble-free maintenance.
  • easily shaped edges.
  • a variety of styles exist.
  • it is possible for it to have strong visual appeal, like stone.
  • damage such as scratches and burns can be repaired.
  • stain-resistant and waterproof.

Disadvantages…

  • vulnerable to heat.
  • prone to scratching.

8. Quartz (or engineered stone)

An expensive but quality material for countertop. A great percentage of it is real quartz stone. You can place it everywhere in your kitchen, as with granite and steel. Again, if price is a consideration it can be used just for a kitchen island.

Some of its characteristic features…

  • durable, smooth and scratch-resistant.
  • a visually appealing material with consistent colors.
  • stain-resistant and waterproof.
  • trouble-free maintenance.

Price of kitchen countertops

The price of your countertops depends on the materials used and how difficult the work is:

  • color, pattern, texture.
  • shaping the edges.
  • possibility of integration with the sink.
  • installation…

Kitchen countertops installation

Even if the installation of your kitchen countertops looks easy, I recommend that you use the services of a professional. Click here to submit your project and receive free estimates from highly rated local, licensed contractors within 48 hours with no obligation.

Ganka Vasileva is the owner of http://www.helpful-kitchen-tips.com, a website containing useful information about the kitchen; about the equipment of this greatly-used room in our home that occupies a special place in our lives. Buying guides for kitchen cutlery, small appliances, cookware & bakeware, kitchen furniture, storage & organization, plumbing, etc.

Kitchen Knife Sharpening Instructions

April 2nd, 2008

Tips about using a honing steel

To properly realign the edge of your knife, it is best to place the tip of the honing steel on a cutting board or kitchen towel holding the rod vertically. This will give you a vertical line and will prevent slipping.

Hold the knife in your strong hand and place the knife blade at the top of the steel at an angle of approximately 25 degrees. Slowly draw the knife down the length of the steel, pulling the knife back so the entire blade, from base to tip, moves against the steel, as if you were slicing off pieces of the steel. Repeat on the other side. Remember, the secret is to be gentle; don’t push too hard. Do this five to ten times, then rinse the knife off and dry immediately. Make sure you sharpen each side the same number of times to retain the knife’s balance.

Using a honing steel Using a honing steel

It is very important to maintain the angle of approximately 25 degrees and to run the full length of the cutting edge along the steel from the handle to the tip of the knife. Speed of movement plays no part in this process.

In addition, always clean your honing steel before using it. The grooves that run the length of the rod can become clogged with grease and food, which will reduce the effectiveness of the steel. If you can no longer feel the grooves on the steel, it is time to replace it.

Use a steel at least 10 inches long, so that you are able to hone your bigger knives as well.

Tips about using manual and electric knife sharpeners

Place the sharpener on a work surface and hold securely with one hand. Draw the knife through the slots with the other hand. Since sharpeners vary drastically, be sure to follow the operating instructions to the letter. If you aren’t careful, electric knife sharpeners can grind away more steel than you may have intended, limiting the life of your knife.

Knife sharpening video

The following video is about Chef’s Choice knife sharpener - one of the top brands on the market. As you will see on the video, it is best to select a sharpener with several slots, angular guides and diamond abrasives. Diamond is very hard, sharpens aggressively and removes metal without upsetting the temper of the knife blade.

Tips about using a sharpening stone

Using a sharpening stonePlace a damp kitchen towel on the countertop and put the stone on top of the towel. This will help prevent the stone from slipping. Grip your knife by the handle with one hand and hold it at an angle of approximately 25 degrees from the stone. Use your free hand to apply even pressure to back of the knife and carefully draw the entire length of the blade over the stone. Turn the knife over and repeat the process. Make sure you maintain the angle of approximately 25 degrees, and always use an equal number of passes for each side. Keep repeating this process until the knife is sharp. When you’re done, carefully rinse the knife off and dry immediately.

To sharpen your knives well, use stones with different grades of coarseness, as with the slots of the sharpeners.

Knife sharpening video

Useful Links:

Ganka Vasileva is the owner of http://www.helpful-kitchen-tips.com, a website containing useful information about the kitchen; about the equipment of this greatly-used room in our home that occupies a special place in our lives. Buying guides for kitchen cutlery, small appliances, cookware & bakeware, kitchen furniture, storage & organization, plumbing, etc.

Zwilling J.A. Henckels Recommended Knife Care & Safety

March 29th, 2008

J.A. Henckels chef's knife

BASIC SAFETY MEASURES

1. Keep knives sharp. A sharp knife is safer than a dull one because it requires less pressure in cutting. The knife will not slip as easily and your hand will not tire as quickly.

2. Use the correct size and type of knife for the job. Hold the knife firmly in your hand and cut away from the body. Use a wood or poly-ethylene cutting board.

Acrylic, ceramic and similar hard surfaces are tough on a knife edge because they do not “give” with the edge.

3. Make sure that knives lying on flat surfaces are never covered with towels, napkins or other materials. After handling a knife, lay it down in a cleared area, with the blade and point away from the body, and away from the edge of the table or cutting area.

4. Do not reach blindly for a knife. Reach deliberately for the handle. When handing a knife to another person, do so with the handle toward him or her.

5. Never try to catch a falling knife!

6. Sharp knives should be washed separately. Do not wash with other utensils. Each knife should be dried separately, always keeping the sharp cutting edge away from the hand. Dry knife blades from the back to the cutting edge.

7. Do not store knives loose in a drawer! Keep knives stored in a knife block or an in-drawer knife tray when not in use. If using a magnetic holder, make sure magnets are strong enough to hold knives securely in place and that the knives are clean. A greasy knife will not adhere properly to a magnetic rack.

8. Keep knives safely out of the reach of children.

9. Never test the sharpness of a knife by running your finger along the edge!

CARE OF KNIVES

A good knife is an investment. With proper care it will last a lifetime.

1. No metal is completely “stainless”. Do not allow acidic foods (lemon, mustard, ketchup, etc.) to remain on the blade after use. This might cause some slight tarnishing. Should the blade show some signs of staining, use a non-abrasive metal polish for cleaning.

2. Do not put knives in the dishwasher. Banging against other cutlery or pots and pans will nick the blades.

3. Wipe the knife clean with a wet cloth and dishwashing detergent. Dry immediately. Dry from the back of the knife to the blade.

4. Knives are ideally stored in a knife block; they may also be stored in an in-drawer knife tray. Try not to put a good knife in a drawer unless you have an in-drawer knife tray. When put in a drawer together with other cutlery, irreparable blade damage may result. This type of storage also results in higher incidence of injury.

5. Do not abuse knives as screwdrivers or can openers. This is not their designed purpose and may result in bending or breaking the blade or edge of the knife.

6. Wood handle knives will last if properly dried after each use, and you occasionally apply mineral oil to the handle to help maintain the attractive finish. This will also help protect handle from moisture damage.

PROPER KNIFE STORAGE

Knives have to be stored in a safe place, protecting the cutting edge and guarding against injuries. While many professional chefs carry their kitchen tools in their own attache case or compact knife roll, you will want a more convenient method of knife storage. J.A. Henckels was one of the first cutlery manufacturers to introduce safe, easy knife storage for the kitchen.

Wooden knife blocks

The most popular and suitable storage system for fine knives. The counter-top slant block offers easy access and fits underneath kitchen cabinets.

The size of the block varies with the number of knives to be stored. Most J.A. Henckels blocks also have a slot for kitchen shears.

Wooden in-drawer knife trays

Convenient for the customer who wants the features of a knife block and wants to store knives in a drawer. J.A. Henckels In-Drawer Knife Tray is designed with the same expertise as the counter-top blocks. It fits most kitchen drawers easily.

Magnetic wall mounts

Convenient for the customer who wants easy access but does not have counter space, J.A. Henckels offers magna bars.

Cutting boards and surfaces

Cutting surfaces should be:

  • Smooth
  • Easy to clean
  • “Give” with contact with knife edge

J.A. Henckels recommends surfaces that can be easily cleaned and kept hygienic:

  • Wooden cutting boards
  • Quality polyethylene boards
  • Remember: If wooden boards are used, clean them thoroughly, immediately after use to avoid harmful bacteria growth.

Avoid hard surfaces than can damage the knife:

  • China
  • Porcelain
  • Formica
  • Tile
  • Other hard surfaces

J.A. Henckels is one of the highest quality kitchen knife brands. Read more about their products on http://usa.jahenckels.com.

Other useful information about knives can be found in our kitchen cutlery category.

Synthetic Cutting Boards Review

March 22nd, 2008

Synthetic cutting board

Characteristic features of synthetic cutting boards…

  • synthetic cutting boards don’t stain easily because of their non-porous surface. Food juices won’t penetrate into them, which will reduce the possibility of bacteria. Some synthetic boards even have an anti-bacterial coating.
  • they are lighter than wooden boards, which makes them easier to work with.
  • you can usually wash synthetic cutting boards in a dish-washer, which is good as far as your board’s hygiene is concerned. (However, the thinner and more flexible synthetic boards may not be strong enough to use in a dish-washer.)
  • they are available in a greater range of colors and shapes, which offers the opportunity to give your kitchen a more modern look.
  • synthetic boards are cheaper than wooden boards.
  • being thinner than wooden boards, synthetic boards are more flexible, which can be useful. For example, you can chop onions and then bend the board to put the onion right into the pan without it scattering out.

Disadvantages…

  • synthetic boards don’t possess the charm of wooden boards.

Click here to view some high quality synthetic cutting boards.

More information about cutting boards can be found in our kitchen cutlery category.

Ganka Vasileva is the owner of http://www.helpful-kitchen-tips.com, a website containing useful information about the kitchen; about the equipment of this greatly-used room in our home that occupies a special place in our lives. Buying guides for kitchen cutlery, small appliances, cookware & bakeware, kitchen furniture, storage & organization, plumbing, etc.