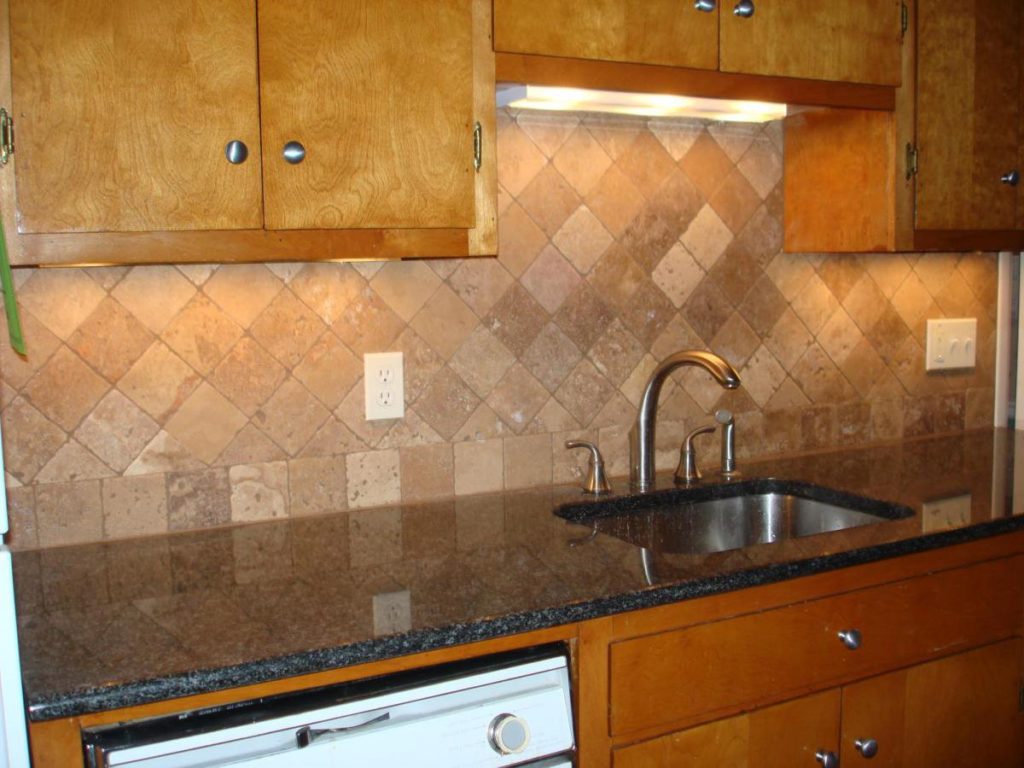
A tile backsplash can transform the look of the kitchen. It can provide sleek lines, a contrast to cabinets, or a splash of color. It also makes messy food prep areas much easier to wipe down and keep clean.
The options on the market are endless and there is tile to fit everyone’s unique style and budget. However, no matter which type of tile you choose, the quality of the installation is the most important factor in achieving a long-lasting, beautiful look. Having a drywall contractor get the job done is the best option. Like your house, the foundation you install your tile onto is fundamental to its durability.
It’s essential that your drywall is prepped and ready for tile installation. You want to provide a sturdy and even backing for your tile. It will make installation easier and the finished product more consistent. There are different methods for properly preparing your wall depending on the existing material.

1. Creating a sturdy foundation
Tile and grout can put a lot of weight and pressure on your wall. Carefully inspect your wall for any structural damage or abnormalities. The rigid tile needs a flat surface to adhere to. Ensure that your drywall boards haven’t bowed or bent in any areas. Make sure the boards aren’t loosely attached to the studs and reinforce any wiggly boards if necessary.
Inspect the area for any drywall damage or mold. You’ll want to remedy this before you begin the basic preparation steps. Keep in mind that your backsplash will likely be there for years to come so it’s worth it to take the time to address any problems before installing.
2. Surfaces ideal for backsplash installation
Tile is best installed on clean, flat drywall. You can also install it on painted and wallpapered surfaces as long as they are sufficiently prepped. Tile can even be installed over other tiles if the foundation wall is structurally sound.
You will want to add a layer of drywall if your wall surface is made from untreated wood material. You’ll also want to avoid installing tile over high-gloss painted surfaces because it can lead to adhesion issues. Fortunately, these can both be primed to create ideal surfaces.
Make sure to test your walls for lead if they were previously painted, especially prior to 1978. An inspector can test your area to make sure it is safe and home testing kits are also available. It’s worth it to check your paint and remove it rather than hiding it behind a wall of tile.
3. Preparing raw drywall
Fresh, new drywall is an ideal surface for backsplash installation. It requires little prep and the surface is ideal for adhesion. You’ll likely not have to remove switch plates or outlet covers.
You’ll want to inspect the drywall installation points to make sure it is securely attached to the joists. If you like, you can tape and seal the seams with a compound. Sand to smooth the seams and clean up the dust. This is optional as it isn’t a necessary step before installing the tile.
It’s a good idea to prime the surface to create a thin barrier between the drywall and backsplash. If not, the drywall boards could potentially pull the moisture from your mortar and compromise your adhesion. A skim coat is ideal to seal the walls effectively.
Once dry, use medium-grit sandpaper to create a slightly textured surface. The surface should be flat and smooth but have enough structure for the mounting material to stick firmly. Wipe down your walls and surfaces with a damp cloth and make sure it’s completely free of dust before moving on to installation.
4. Prepping a painted drywall surface
If your wall is previously treated drywall, there are a few extra steps to prepare your space for installation. Depending on the existing wall treatment, extra care might need to be taken. Even the thinnest wall finish can compromise your backsplash installation if the adhesive is unable to grip on to it.
If your surface is simply painted with a lower gloss finish, prep is simple. You’ll need to remove switch plates and outlet covers, being careful to hold onto the screws. Then, gently scrape any loose or peeling paint off the surface.
Your kitchen walls may be harboring grease that can prevent the tile from adhering correctly. Wiping down the walls with a vinegar mixture or ammonia-based cleaner can remove any film that is layered on. Let the wall dry and inspect it for needed repairs.
Make sure your drywall is a flat, seamless surface. Patch any large holes or dents that are visible. Allow to dry and sand the entire installation surface to create a textured foundation for your tile installation. Wipe carefully to remove all of the dust and vacuum the area thoroughly.
5. Preparing a wallpapered wall
In order to install a backsplash on a tile wall, you’ll need to first remove the wallpaper. Carefully pull off the wallpaper in as large of pieces as possible to minimize damage to the drywall. Steam can be helpful in releasing the glue from the surface.
Once all of the wallpaper is removed, carefully sand the wall to make it as level as possible. Patch any dents or holes that remain and sand again. Remove all of the dust and strips of paper thoroughly to ensure a clean surface to mount the tile on. If the wall is unpainted under the wallpaper, a primer or sealant can be applied for optimal adhesion.
6. Prepping a previously tiled wall
Installing a backsplash over a previously tiled wall gives you two options. You can remove the existing tile and prepare the drywall. Some people opt to tile over the existing tile but this may not be an option if your wall structure isn’t stable enough to withstand the added weight.
Removing tile can be a tough task. Being careful and taking it slowly will pay off in the long run with reduced damage to your drywall. Once the tile is completely removed, scrape off any adhesive that remains.
After the wall is cleared of the old installation materials, inspect the drywall carefully for any damage or issues. Patch any holes and cracks and make sure the drywall is even to create a solid backing for your new tile. After dry, sand it to create a smooth surface and carefully remove all dust from the area by wiping down the walls or vacuuming thoroughly.
You may remove the tile to find that the wall is damaged beyond repair. A new drywall board can be installed atop the existing wall area. Look for a thinner board to cut down on the expansion onto the countertop. After ensuring that it’s securely attached, follow the steps to prepping the raw drywall.
Conclusion

As with all projects, make sure you follow safety rules and procedures. Wear masks when needed and protect your eyes from debris. Work carefully and patiently and you’ll create a perfectly prepped wall, no matter what the existing material is.
You’ll be grateful that you took the time to properly prepare your wall when your tile job goes smoothly. Knowing that you’ve created strong support for your tile to adhere to will give you peace of mind. Your beautiful backsplash will look fresh and new for years to come thanks to your due diligence.