If you are looking to give your kitchen an antique look, glazing kitchen cabinets could be the right solution for you. Moreover, it is a very cost effective solution for remodeling your kitchen. However, people glaze their kitchen cabinets for some other reasons too – to make the stain look darker and to create depth (the depth effect).
What does “glazing kitchen cabinets” mean?
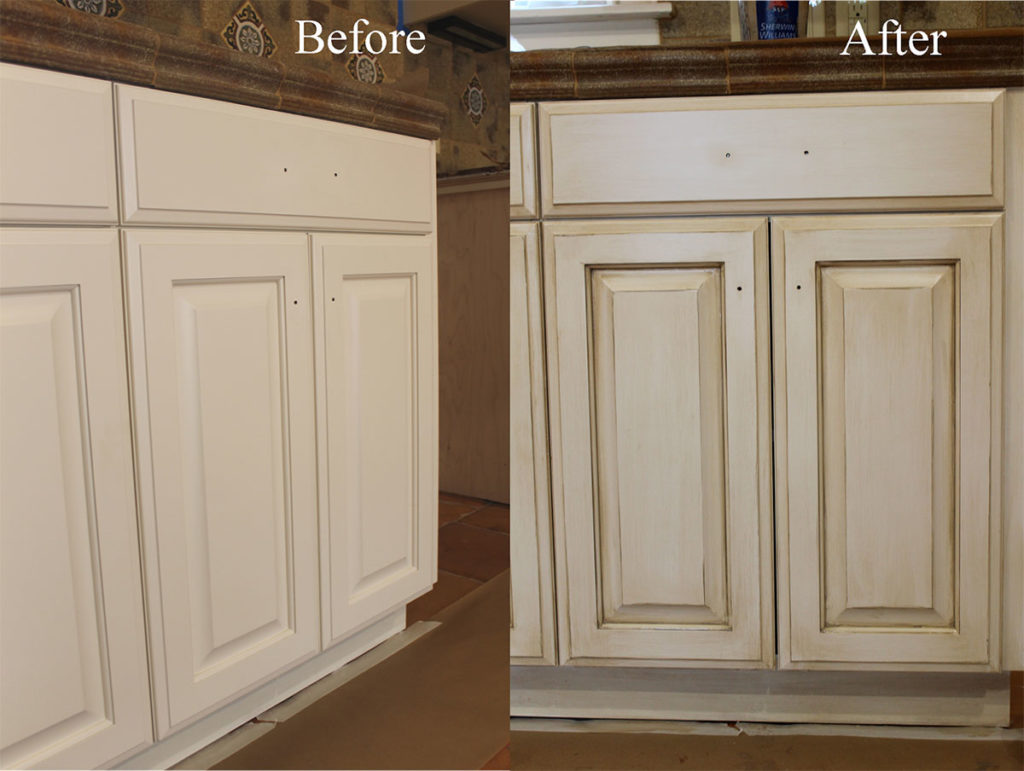
“Glazing kitchen cabinets” is a simple process that involves using a watered (or diluted) version of paint on the surface of your kitchen cabinets in order to create a semi-transparent layer that makes the cabinets look darker in some places and lighter in other places. This renders an aged or worn-out look to your kitchen cabinets. That’s how you give an antique look to your kitchen.
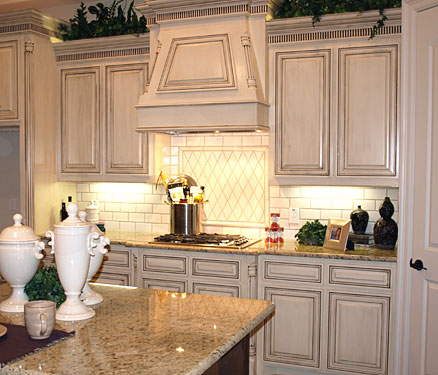
In general, glazing kitchen cabinets involves the same amount of work as painting kitchen cabinets. It projects a look that you have upgraded your kitchen. The antique look of kitchen cabinets can especially be useful to you if you already have antique furniture in the kitchen or are planning to get antique furniture. Sometimes, glazing is done on corners of cabinet doors and highlights the wood in specific areas.
Preparing to glaze kitchen cabinets
The preparations for glazing kitchen cabinets include the following:
- Purchasing the right glaze (glazing liquid) from the market or preparing your own glaze. Since glaze doesn’t have a color of its own, it is mixed with paint. In case you are making your own glaze, you can control the thinning to any extent you want for lighter or darker shades.
- Since the glazing mixture is prepared using glaze and paint, you will need to choose the right color of paint that would be the best for your kitchen. People generally use grey, brown and black paints for glazing kitchen cabinets (based on what kind of look they want e.g. black helps attain an elegant look, brown for earthy look, grey for chic look, other colors to match the furniture in your kitchen).
- Besides the paint and glaze, you will also need old rags, clean pieces of cloth, a natural bristle brush, a bowl and a mixing stick to prepare the mixture. And do not forget to get some drop clothes in order to ensure that you don’t dirty your kitchen with the mixture falling on floor. Gloves are a must if you want to protect your hands.
- Different level of dilutions might be used based on what you want e.g. if you need to make the grain of wood visible, you should use higher level of dilution (i.e. more glaze and less paint).
How to glaze kitchen cabinets
1. Before you begin glazing kitchen cabinets, you need to dislodge the cabinets and remove any doors and handles, etc. Glazing kitchen cabinets with cabinets in place would be a bad idea since you would not be able to get an even finish on them.
2. You will need to clean your cabinets thoroughly ahead of the glazing process. It is recommended that you use a commercial cleaner so you get a better finish on your glazing. But you can leave this out if you have just painted your kitchen cabinetry prior to glazing.
3. Now you can prepare your glazing mixture based on how dark you want the glaze to be e.g. using 3 parts paint and 1 part glaze will make it really dark and as you change the ratio it becomes lighter. Mix them properly in order to get an even color and to ensure the mixture is correct.
4. You can now start applying the glaze using the rags. The general preference is to go with the strain of the wood but you might have a different preference. You should just glaze a small part of one of your cupboards and see if you like it. If not, you can take it off with a clean cloth while it is still wet. In fact, to ensure a uniform look, you should go piece by piece and make adjustments on the go rather than waiting to finish it off all at one go. You might use the natural bristle brush for edges.
5. And once you are done, leave it to dry for 8-9 hours.
Quite simple, isn’t it!
Great post! There are a lot of aging, antiquing, and glazing techniques for re-doing kitchen cabinets. If you are looking for DIY kitchen cabinet ideas there are a lot out there. Thanks for sharing the tips.
Great kitchen cabinet refinishing info. Keep up the good work!
I shared your post on glazing kitchen cabinetry on my Twitter account, thanks.
Useful information as usual! I would like to thank you for sharing your kitchen ideas and putting the time into the articles you publish! Thanks!
Thanks for sharing this article about glazing kitchen cabinets. Best Regards, Loris
What colors were used on the cabinets in this post? Then what glazing color was used? Thanks
Hi Angela,
Please ask the owners of the photo for more information.
Regards,
Ganka